Let's Adore Jesus-Eucharist! | Home >> Varia >> Bachelor's Kit
I'm not even sure what to call this object. It's a pad of paper, and it's for the outdoors, so "Field Notepad" ("Fieldpad") is a suggestion. It could also be called "Last Ditch Laptop", because nobody in their right mind would use this thing if they also had the choice of using a computer. Computers are marvelous brain enhancers, and no pad of sheets of paper can ever help our brain think and remember like a computer can do. But when the SHTF, something is better than nothing.
A Field Notepad has many advantages. It never needs to recharge its batteries. You can sit on it, bend it, even throw it down a cliff and it will still work perfectly. It is very light and inexpensive. With a bit of juggling with a plastic bag and a flashlight, you can read and write in a downpour at night. With good quality ink and paper, it will still be readable hundreds of years from now. It's totally protected from computer hackers. And so on.
Many years ago I did a stint in the Canadian Armed Forces, so my idea of a field notepad was:
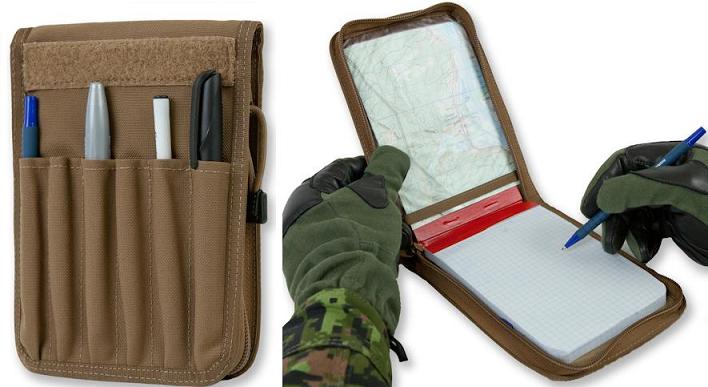
Typical Canadian Armed Forces Field Message Book.
(Source: www.cpgear.com)
Advantages: it exists, it's roughly the right size to hold in one hand while you're writing on it with the other, it fits in military pockets, the paper is ruled with squares for writing and making sketches, the sheets are perforated at the top so they can be torn out easily, the corners are rounded so the pad won't hurt you if it's in your pocket and you fall on it, very light and relatively inexpensive, etc.
Disadvantages: it's bound so you can't add or change the order of sheets (which becomes even more important when you have written someting important, and you want to save that information, without digitizing it), it's hard to write on both sides of a sheet (so half the pad is wasted), the pages don't turn very easily, it's very custom and nearly impossible to find in stores, etc.
If you don't like this "Field Message Book", there is another solution which uses metal binders:
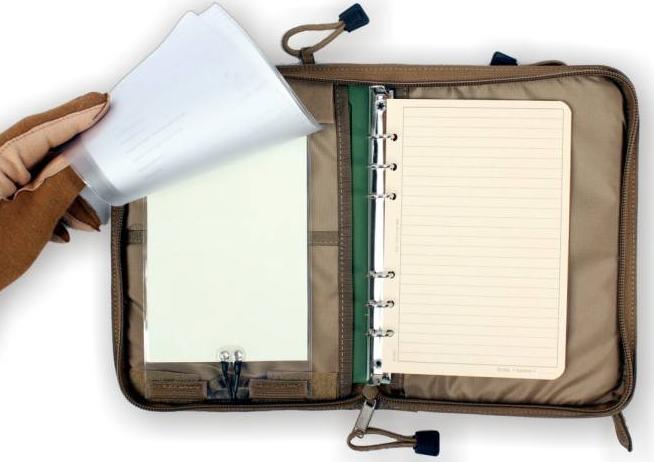
Six-ring binder field book.
(Source: www.cpgear.com)
Advantages: Roughly the same as above, with critical advantage of being able to decide what pages you are going to put in, and in what order.
Disadvantages: Unfortunately you lose the extreme simplicity and lightweight (and low cost) of the first field book. I tried to use something like this while in the army, and it was just to big and heavy to carry around all day.
The fundamental problem with the two solutions here above is that they were designed before computers became ubiquitous. The designers did not think of these notepads as backup computers (because back then, if they had, they would have been thrown in an asylum for the insane!).
These days, a paper notepad must be designed from the ground up with computers in mind. We want a backup laptop, not some wad of paper usable outdoors. If the information in my laptop cannot easily be transferred to this field notepad, this notepad is useless to me. It must be easy to use computers to make (and regularly update) all the contents, then print everything out on paper and integrate these sheets into the field notepad.
3.1) The size of the paper sheet. If something is to be easy to print out, it needs to be printable on commonly-available paper. Yes, in theory you could print it out on any paper, then cut it to size. I've tried that, and it's too much work. These days in North America there are only two commonly-available sizes of paper, Letter and Legal. If you cut Legal (8.5x14") in four, you get 7x4.5" sheets, which is just about right to hold in the hand and put in your pocket. (These days I cut them a bit smaller than that, so a fieldpad will fit nicely in a standard ziploc bag, something like 100x166mm.)
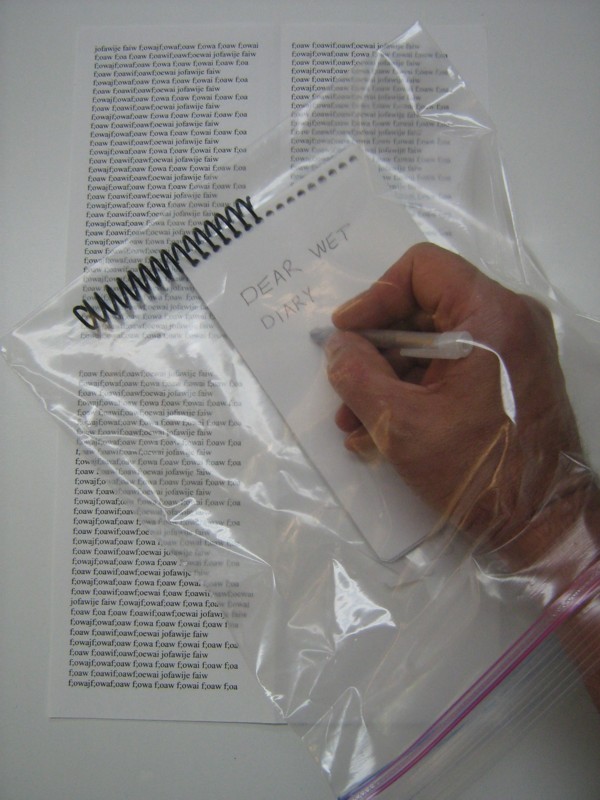
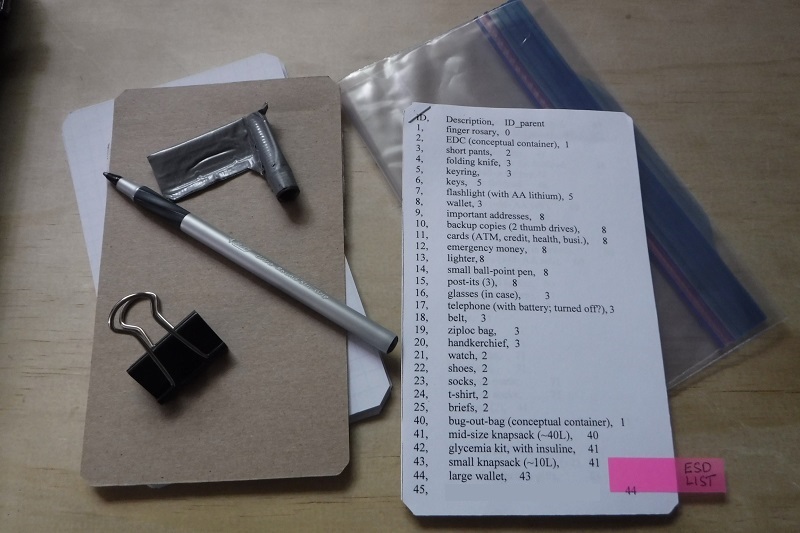
With a few minutes of fiddling around with Microsoft Word, you can make it print on a sheet of Legal paper. (You can see this in the first picture above, there is a Legal size sheet with gibberish printed on four pages per sheet.) This is how I do it in MS-Word 2000, but I tried it in MS-Word 2010 and it's roughly the same, just more painful because of the "Ribbon Interface":
- New blank document;
- "File" Menu, "Page Setup" menu item;
- Select "Margins" tab;
- Set all margins to 0.5 cm (well, something small);
- Set "header/footer" to zero;
- Check "2 pages per sheet" checkbox;
- Select "Paper Size" tab;
- Set "Paper Size" dropdown list to "Legal";
- Set "Orientation" to "Portrait";
- Click "OK" to close dialog box;
- "Format" Menu, "Columns" menu item, for the "Columns" dialog box;
- Set "Number of columns" to 2;
- Click "OK" to close dialog box.
After I've cut the sheets in four with a sharp knife, I cut a few millimeters off the two bottom corners, to round them off a bit.
3.2) Where to bind. I assume the sheets must be somehow held, so they won't fly away in the wind, fall out unnoticed, or get all mixed up. Given the sheets must be bound, it seems obvious they should be attached to each other on the shortest side of the sheet, in order to minimize the space wasted by the binding.
3.3) How to bind. The lightest, simplest, strongest and least expensive bindings are gluing the sheets together, or stiching them, or stapling them. We also know the best binding for quickly removing, adding and reordering pages is the heavy, complicated and fragile ring binder.
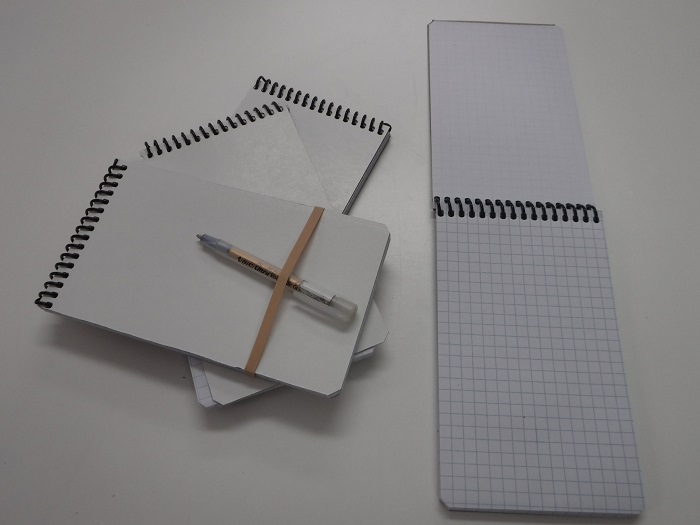
The binding which combines as far as possible (in my opinion) the advantages of these two extremes is the plastic spiral binding. You can remove it by "unscrewing" it off the stack of pages, and with a bit of practice you can "screw" it back fairly quickly (the first picture on this page shows such a binding partially removed).
The only minor problem with this binding is making the holes. These are smaller holes than what used on typical three-ring binders. They are 4mm wide, at a 6mm pitch (distance from center to center). Any office supply store like www.Staples.ca can punch those holes and add the spiral (but it's unarmed robbery; I paid 11$ just for binding the little stack of sheets you see on the top picture, and I supplied the stack of sheets!). If you clamp the sheets very tightly between two scraps of hardwood, and drill with a 11/64" bit, you can do almost as well as a 200$ "Akiles RubiCoil Coil Punch and Inserting Equipment". I also assume you could buy bulk spirals at a much lower cost from places like www.mybinding.com. Moreover, anybody who works in a normal city office probably has access to such tools and supplies.
3.4) Waterproof paper? Some people seem to like a commercial product by www.RiteInTheRain.com. They have Legal size, for laser printers, 40$ for a ream. Maybe a few sheets per notepad?
3.5) A few sheets of carbon paper. Our notepads in the Army had a few sheets of carbon paper. It works, it's inexpensive, it let's you make a copy easily (if you're copying something simple, like handwriting or a sketch), etc.
Coming up with a reasonably good field notepad is easy. The hard part is filling it up with useful information. Ideally, I'd make a computerized document filled with:
- Some encouraging and inspiring texts that remind us of our duty as
Christians (to foster our will to survive);
- Practical "survival skills cheat sheets" (also called "SOP or Standard
Operating Procedures" in the army) for common tasks like first aid,
signaling for help, how to use a map and compass, etc.;
- List of all my equipment (so I can check if I have everything);
- Contact information of all my family and friends;
- Calendar;
- A few local maps;
- My last will and testament;
- Etc, etc.
Such a content, printed and bound in a practical format, with extra blank pages for notes and messages, with everything placed in a large ziploc bag with a home-made "Space Pen", would give a very acceptable Field Notepad!
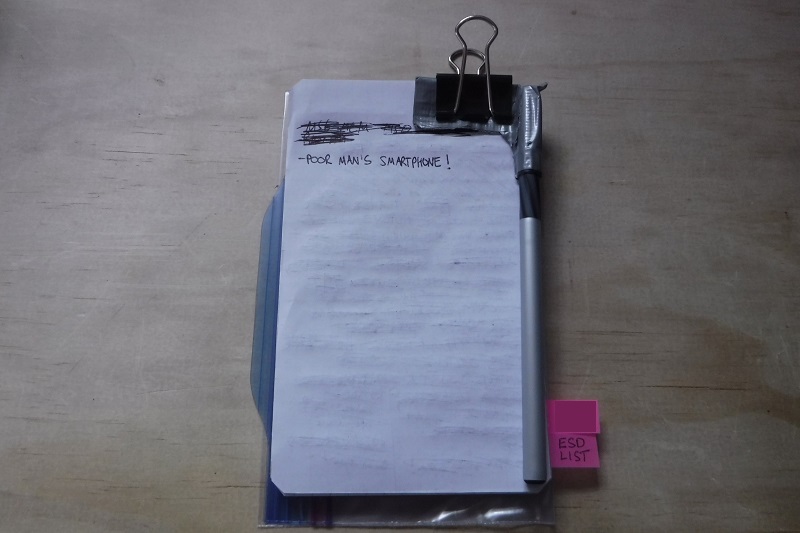
Currently, I use an even simpler version, without spiral binding. A big clip holds the sheets together, and the "chapters" or anyway the page groups that are fairly stable and that go together are simply stapled together, and then clipped with the rest. I keep a scrap sheet on top, where I scribble things like: "quart of milk" or "shovel Mom's driveway", etc. The ziploc bag is folded underneath and clipped. The pen is the most ordinary available on the market, with a thingie to keep it clipped made with duck tape. Meh. It's ugly but it works and it's cheap.
Let's Adore Jesus-Eucharist! | Home >> Varia >> Bachelor's Kit